

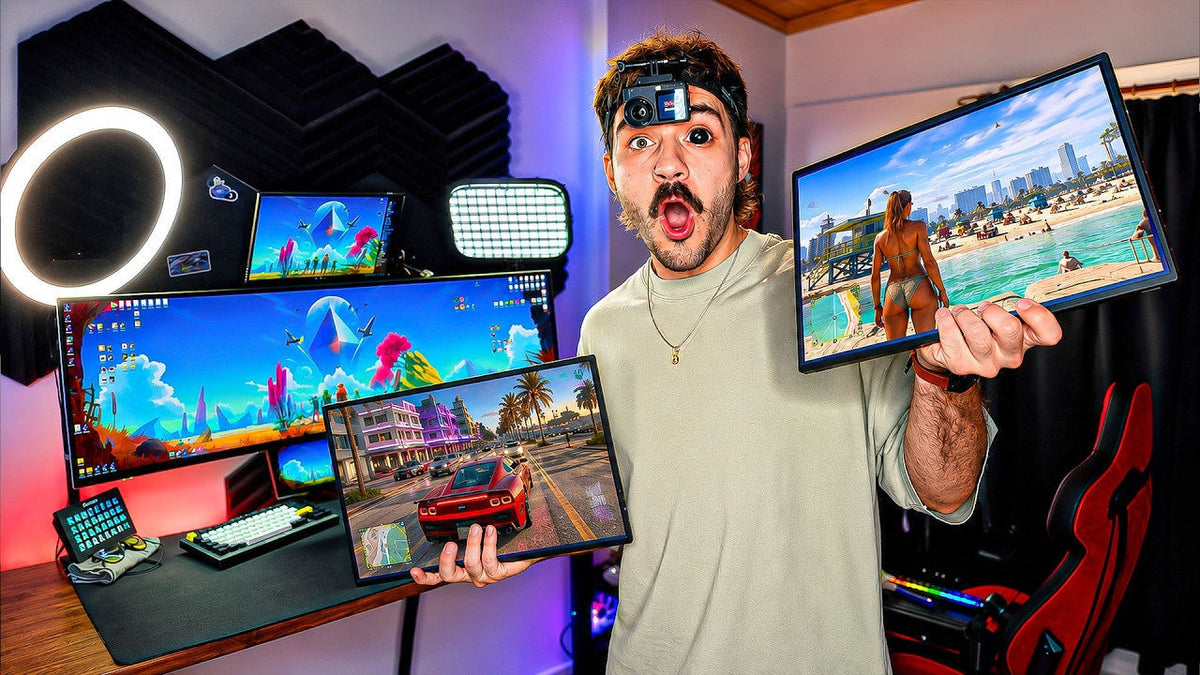
What do you mean two more screens? You don’t have one, two, three, four, five? You caught me a little I’m going to change this one and this one, which are old screens, to the perfect ones, if you remember what I had made a video about these two new identical models to upgrade the setup. The upgrade never ends.
The old small screen

You always ask me in the setup what this small screen is. It’s the same as that one there. It’s an old UPF that I bought because I saw a setup somewhere on the internet and liked it, and the Samsung G9 OLED Ultra White.
The new UPERFECT screens
That was the most perfect thing and the professional special company that makes the small portable screens, and I’m like guys, don’t you want to send a new one? Let me show it in the video, let me show the kids where I found it, what it does, how it works.
Inside the box

Cables and power
So, inside you have mini HDMI to HDMI, USB-C to USB-C, because it can work with both power and signal with just one USB-C cable. That’s why you have two, and you also have, he told you, if you don’t have power and, I don’t know, you want to connect it directly to the PlayStation or Xbox or Nintendo, you also have a Power Brick to make it convenient for me to remove this from here.
The screen and case
And this here is the screen, which comes in this case. Which can also function as a stand at some angles, and you take it out from inside because it is with a magnet.
Ports and controls
You have mini HDMI, 2 USB-C, controls for and settings on/off audio jack, little feet for it to stand better, and these here for me are important because with this I will screw it there.
The UPERFECT GR16EQ

Display specifications
This particular one is this one here. UPERFECT GR16EQ, which is not only 16 in zone 16 by 10 ratio, it’s not 16:9 because I liked the ratio that this one has, 16:9, it is exactly the same there and I simply wanted them to send me a new one.
Gaming and portability
It’s a Mat finish, 144 Hz, it will work for portable gaming or if you like to play on a 16-inch screen. Also, it is Quad HD with resolution 2160*1600, a little more than 2K because it is a little taller. You see, it is very light, which is why I want it up there because I don’t want to weigh down my desk any more, and before I do, to change it, I want to connect it to the PlayStation so you can see it.
Discount codes
Also, you can see it with a link in the description and I have two discount codes for you. Mobile30 for $30 off with a purchase over $200 and Mobile40 with $40 off with a purchase over $300. For all of you who ask me where I found it, now, you know where you can find it and you can get one too.
Connecting the PlayStation

Mini HDMI adapter
And because I tried to connect it to the PlayStation with regular HDMI, but it’s Mini HDMI, they were sweet and they also sent me an adapter that they have on their page to make the setup much more sleek, and it is a 180° adapter, Mini HDMI to Mini HDMI, and because we don’t feel like passing more cables, I had another mini adapter in storage, an adapter on top of an adapter, so what I’m going to do is I’ll put the mini HDMI here, the other HDMI here, and this will go like this nicely here and I imagine that this is how it will look up there, the little adapter hides the cable, the little adapter I also gave the name Q to the adapter.
Testing the connection
Wait, let me put the HDMI into the PlayStation and turn it on, and this also needs power. Well, to test if it works with a power bank. Holy, it works. It works with power. Wow! I didn’t expect that.
Testing the display

Picture quality
I like the matte finish for zero reflection. Let me increase the sound a little. This is the brightness. In the menu, how do we enter? By pressing the wheel it has here we have to change color temperature. Let’s put GTR signal source auto, volume. I want, I want to increase the sound a little.
IPS panel and response time
It’s an IPS panel. It looks wonderful. with small bezels. The response, the response time now is at 3-4 ms.
Portable PlayStation setup
Lowy, you can make a portable PlayStation 5 setup with this here. This setup is for all of you who will be somewhere else when the G6 comes out.
Gaming test

Black Ops 2
Okay, Black Ops 2 port on the PlayStation 5 does not support 120 FPS, but I said I would try to see how it runs and I can say that it runs just fine. Even though I took the shock charge there, I killed the guy. Now you got the charge. Well deserved. Nice. Enough, enough, enough. Close game.
Preparing the new mount

I won’t need the case. Time to see here I have to move these. Let me show you my wonderful cable management here behind and my wonderful DIY mount that I have made for this UFC, the old one that will be replaced by the new one. Or you know what, I won’t put another one up here. No, I can’t. I don’t have any more HDMI ports, man.
USB-C and Samsung Dex
Irrelevant that it can also take signal with USB-C, which means that with the USB-C that comes with it I can connect it to my phone and run Samsung Dex and use my phone as a mouse always. Extreme, man.
The ultimate setup idea

A new idea
Classic Axel, he gets carried away with the smallest things. I just thought of something extreme, I was holding both of them in my hand. This is ultimate setup. Uh, I don’t know now which camera to show it from.
The POV
I hope the one I had in my head shows the POV. What? Wow, this would be insane. I would want that. It’s just the graphics card I have needs to have two extra HDMI.
Installing the new screen

Well, take out this USB-C that gives power. Take out the HDMI that gives signal. Unscrew it from dust. Well, what can I do, guys. Dust and mosquitoes shouldn’t be there again. Good thing I have the huge tool for dusting, my favorite tool. After Hoover, the box comes with four screws for the, for you to screw it onto the Vesa mount. I will use two on my DIY mount.
Installing the screen
In the hole here, one. The only thing is that the cable is blocking a little right now. I just hope I won’t have to lower this mount and it will be where it needs to be. Wait, let’s find the hole. Nice. From where I am it fits perfectly. With the bezel of the G9 ending here and the other starting from here.
Passing the cables
 Now let’s pass all the cables. The HDMI adapter goes in nicely. Here the HDMI cable comes. Please, don’t make me pull it extra. Maybe I’ll have to pull it extra. Well, unless I pass it through there and you know what, I can pass it through here somehow. My OCD with the cables is bothering me a little now. The USB power I can definitely pass through here. Like this, nice. And it fits perfectly here.
Final cable setup
Look how nicely organized the cables are. I made some sacrifices, some procedures. I got involved with cables again. I passed the HDMI here, which tell me that I’m putting it in wrong. I should have made one turn. And look how nice the cable is there. And the signal. Where is the signal? I see we have power. We also have signal. Well, wait, let me push everything back as it was.
First screen completed

Adjusting the desk
Now the upgrade here was more difficult. Than in the SIM setup. There it was just unscrew and put two cables that were there. Here I had to calculate them a little better and it is ready. Wait, let me lower the desk back there where it belongs to the height where I sit. And here we are, ready. Let me also put the camera for video back here. Nice. How was it with 144 Hz now from above.
Replacing the second screen

HDMI box setup
Time to change it there too. And those of you who ask how I have two identical screens on top. Basically behind there underneath I have an HDMI box which takes one signal and makes it two. It does copy paste because very simply I wanted this screen up here to show the same screen here where I am in Sims.
Installing the second screen
I see OBS, I see Chrome. So I don’t need to move my mouse right and left. A little closer now that we’ll go here. Here the process, as I said, is much easier. I have two screws here too. Now I’ll put four. I’ll unscrew it and unscrew. I have the screw in my mouth. That’s why I’m talking like this. I’m having difficulty finding the hole, guys. I found it. Nice. And it’s ready.
Final setup adjustments

Cable placement
And this one, the only negative because in the previous one the cables came out from the right. Here they come out from the left, which means when I will sit and we will do sim racing, I will see at least one cable, because okay, the HDMI I have the necessary adapter here.
USB-C adapter
But the USB-C, however, I don’t have. They have it on their page. They just didn’t have it in stock, they couldn’t send me that one too. The one I put there I already had at the spot.
Final setup
I have to order an extra adapter so this cable here doesn’t annoy me. Actually it looks very nice with the adapter. I would prefer it to be on the right, but adapter from Sony and so I will be here. I will sim race, I will have this screen which can move a little, which is a copy paste of the other one there and the upgrade will probably finish here.
Share:
UPERFECT GR14BU 14 inch 3K OLED 120Hz Gaming Monitor Reviewed by Better Gaming
UPERFECT GR19BU (UColor 19 Apex) UHD Gaming Monitor reviewed by PC Crazy