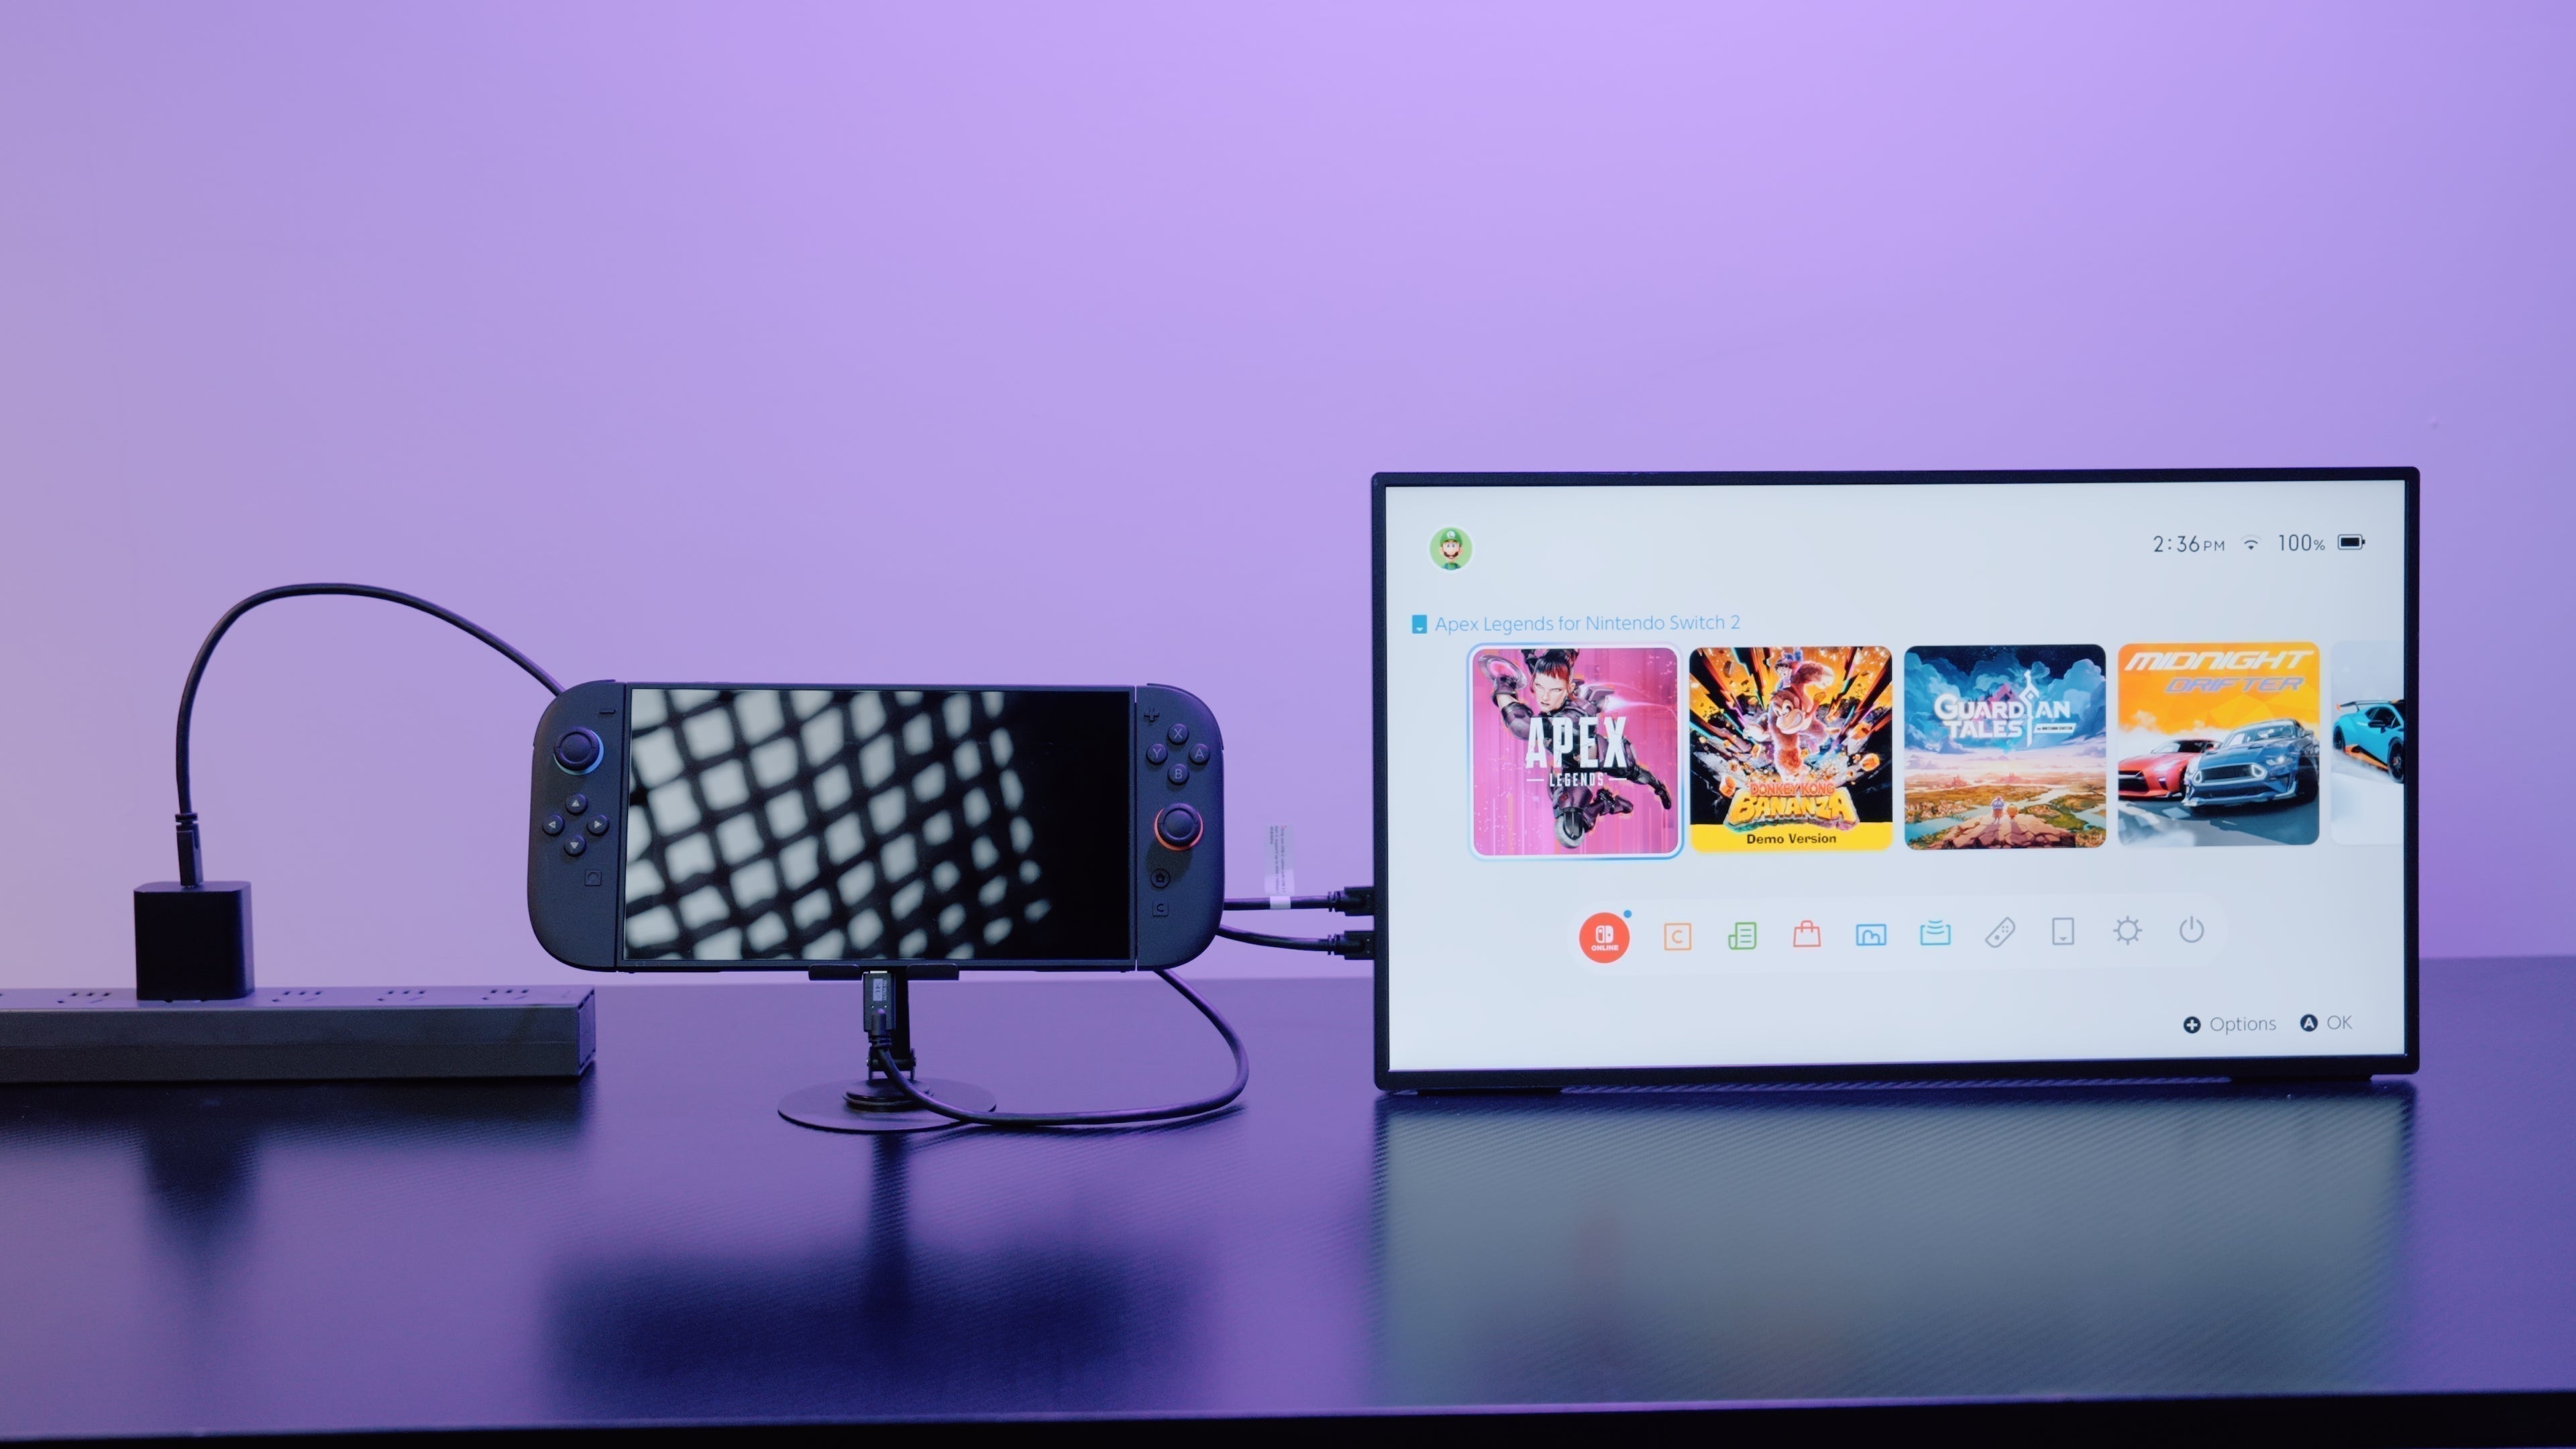
Due to version limitations, Switch 2 may not be able to connect directly to portable monitors via a USB-C cable. To address this issue, we have updated the firmware for certain portable monitors, enabling them to work properly with a direct USB-C connection. If Switch 2 receives future system updates, we will also update the software accordingly.
Click to Download the Firmware for Your Monitor
The SOP (Standard Operating Procedure) for most monitor upgrade software is generally similar; the main difference lies in the firmware being loaded (please pay special attention to Step 4 for details). Here, we will use the GR19BU software upgrade SOP as an example. If you need to upgrade other portable monitors, please click the following link.
| Model | Original Model | Firmware Upgrade File | Update Date |
| BE173BU | UColor J5 | Jun-26 | |
|
|
UTouch G16 |
|
2025 |
| GR19BU | UColor Apex | GR19BU_Firmware_Upgrade-2 | Jul-26 |
| ZX27BU | UMax 27 Switches | ZX27BU_Firmware_Upgrade | Jun-26 |
|
|
/ | BE16BU_Firmware_Upgrade | Jun-26 |
|
|
/ |
|
Jun-26 |
|
|
/ |
|
Jun-26 |
| GR19BU | UColor Apex | GR19BU_Firmware_Upgrade | Jun-26 |
| BE173BU | UColor J5 | BE173BU_Firmware_Upgrade | 2025 |
Portable Monitor Firmware Upgrade SOP
When connecting the Switch2 to the GR19BU (UColor Apex) portable monitor via a single-cable (one-line) connection, a software upgrade is required. Please click this link to download the software and follow the instructions below.
GR19BU_Firmware_Upgrde (Updated on June 9, 2026)
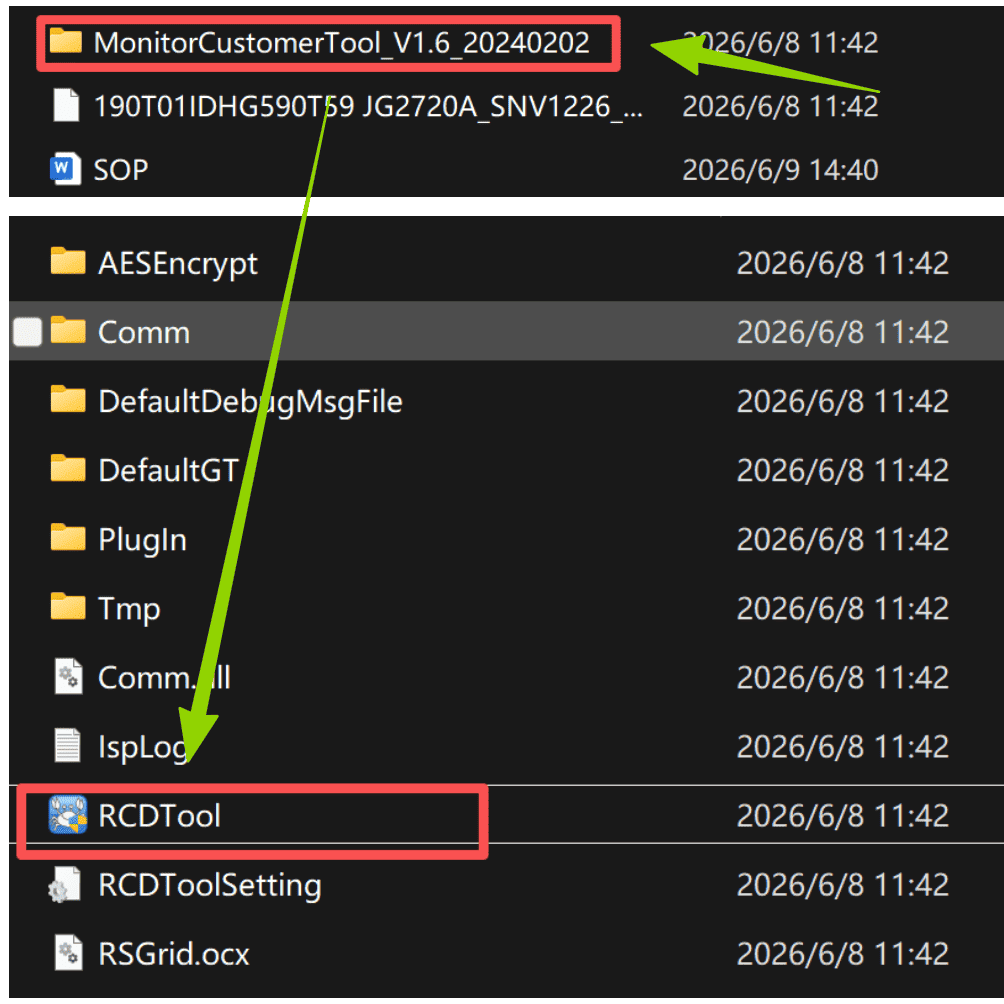
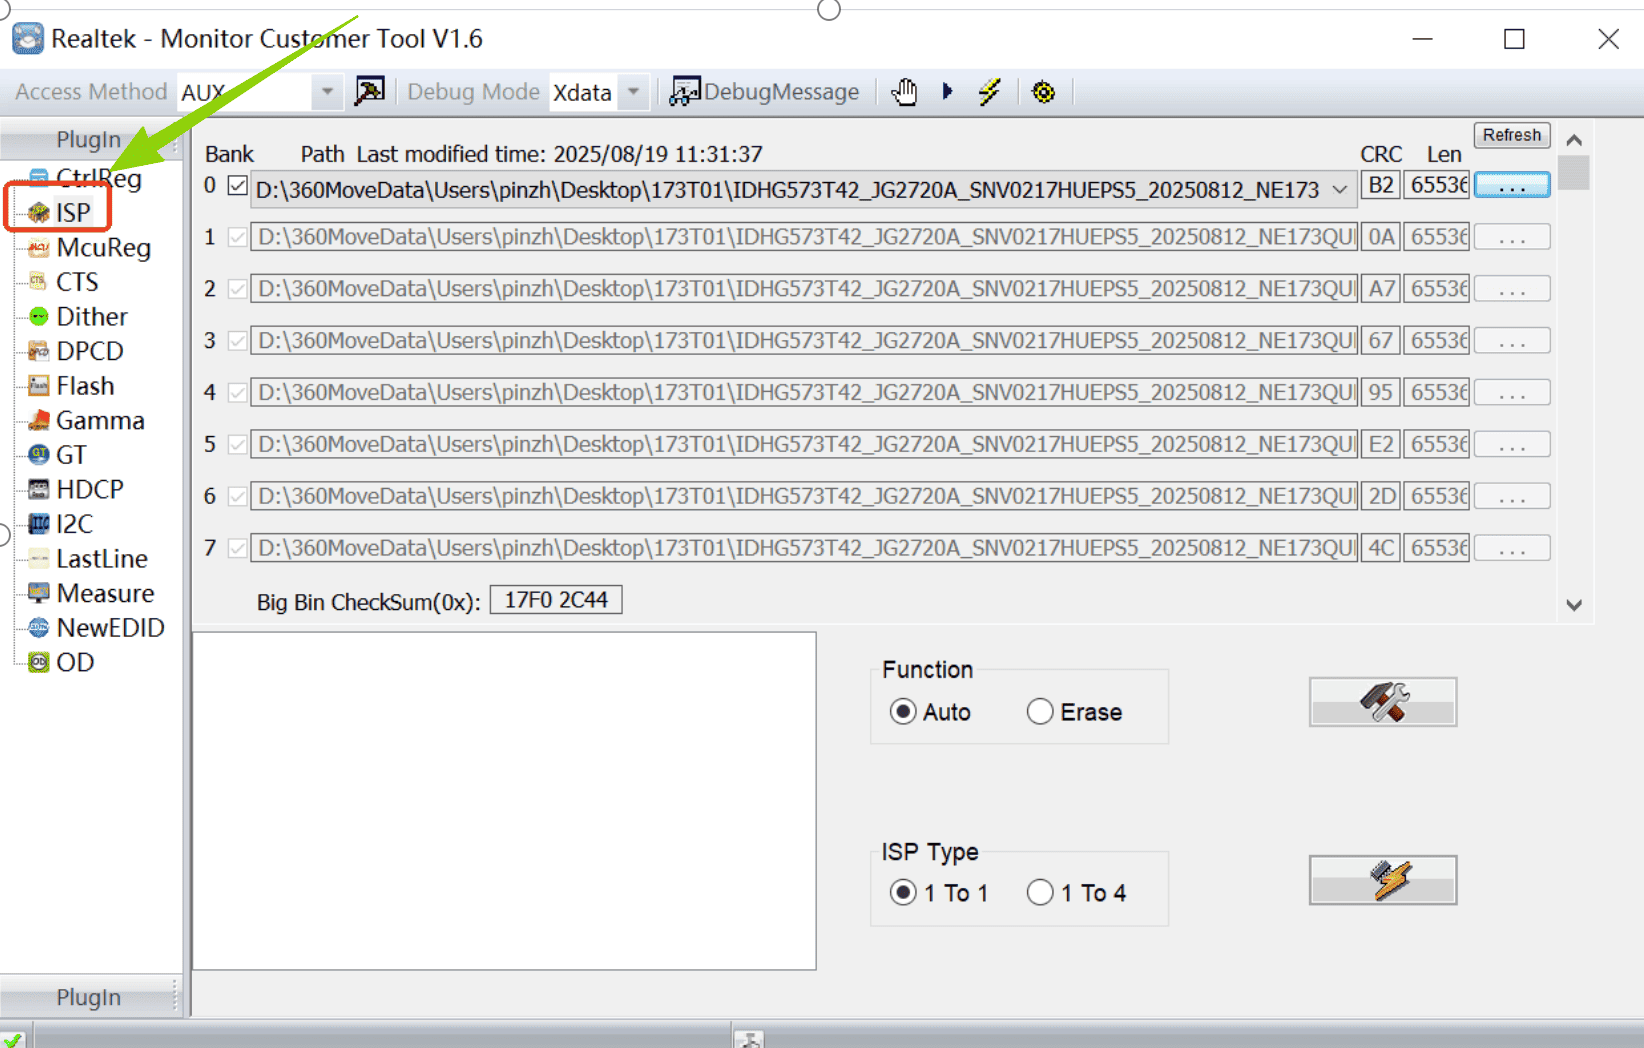
- 1. Unzip Customer V1.6.zip, then open the folder and double-click RTDTool.exe. Select ISP.
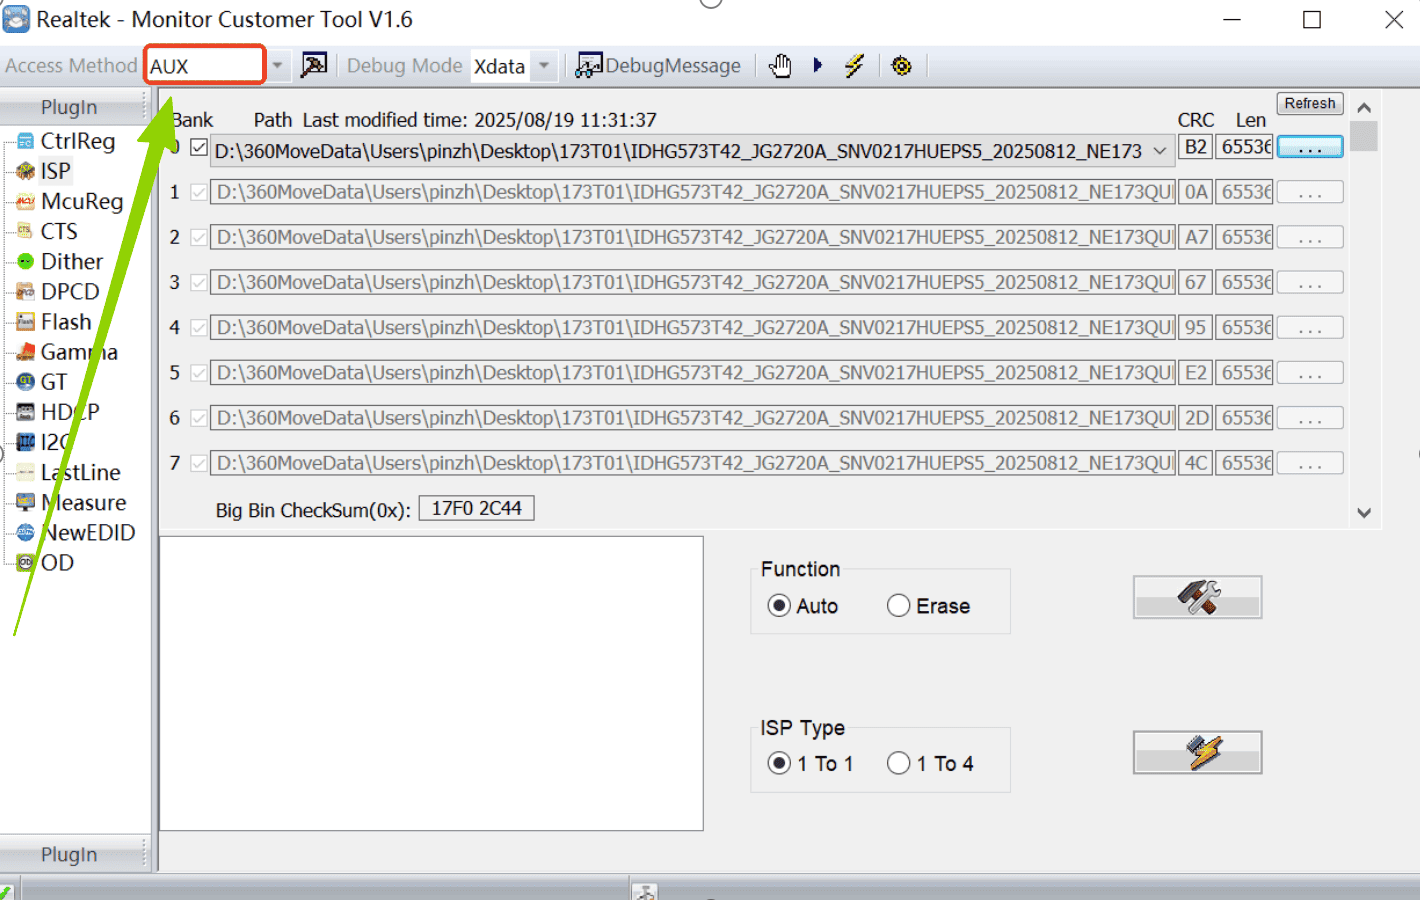
- 2. Select AUX here.
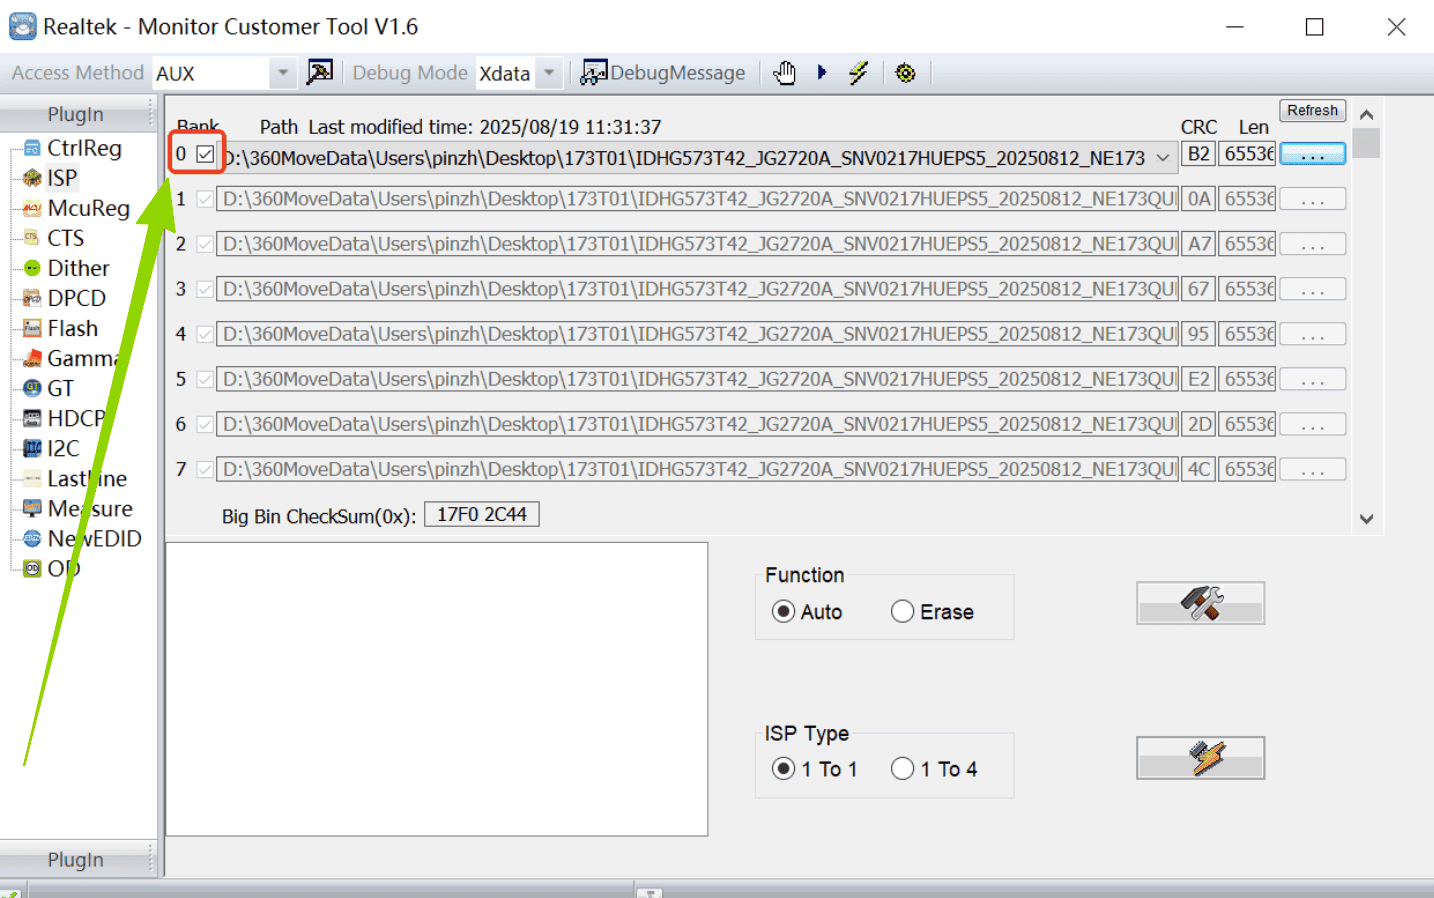
- 3. Select 0 and check the box as shown in the image.
- 4. Load the firmware:
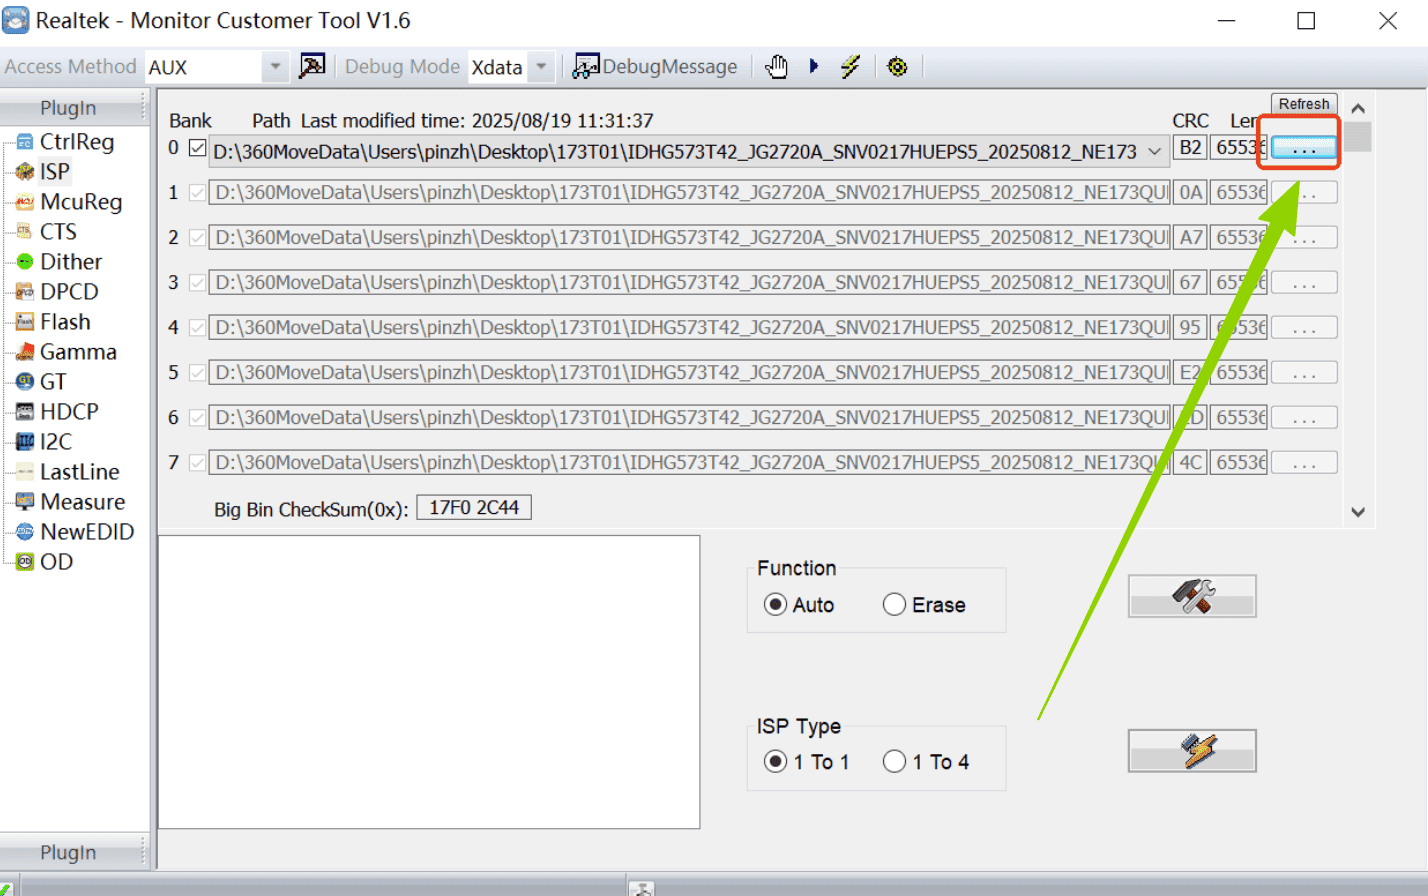
The firmware is the file in the attachment named:
190T01_U190OMN571_3840X2160_144HZ English Headphone Jack Down Update Size 19 Default to 4K60Hz F006.bin
⚠️ Important: Firmware file names vary for different monitor models! However, the SOP in each installation package will indicate the correct file name.
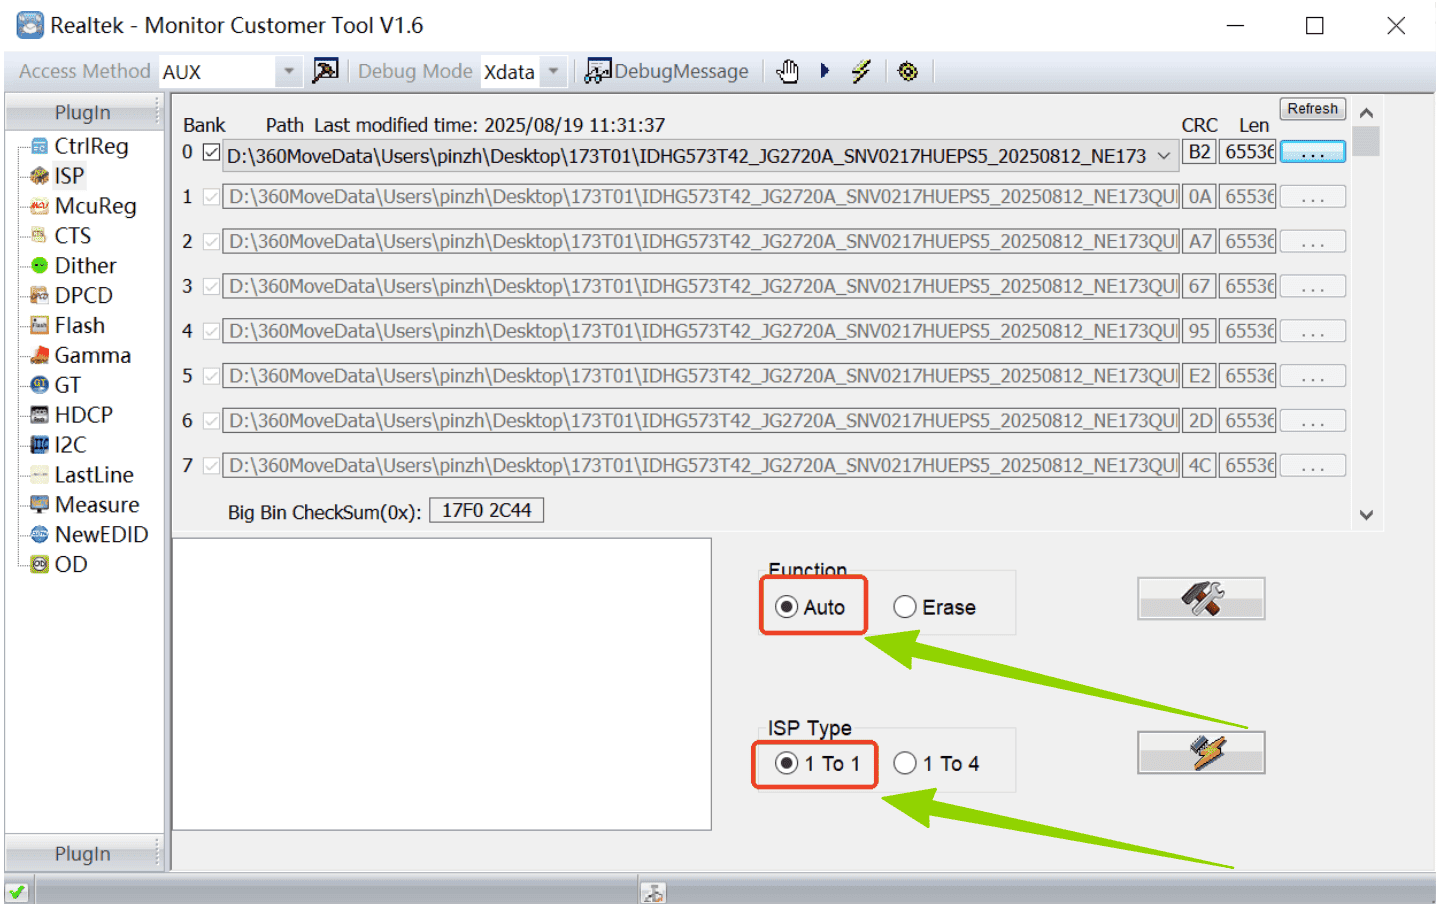
- 5. Check the two options shown in the image.
- 6. Connect the monitor to its standard external power supply, then use a Type-C cable to connect it to the computer.
Requirements:
- The computer must be a Windows system
- The Type-C port must be a full-function Type-C port
- The Type-C cable must support full-function (with DP signal)
- ⚠️ Important: Do NOT disconnect the power during the upgrade process.

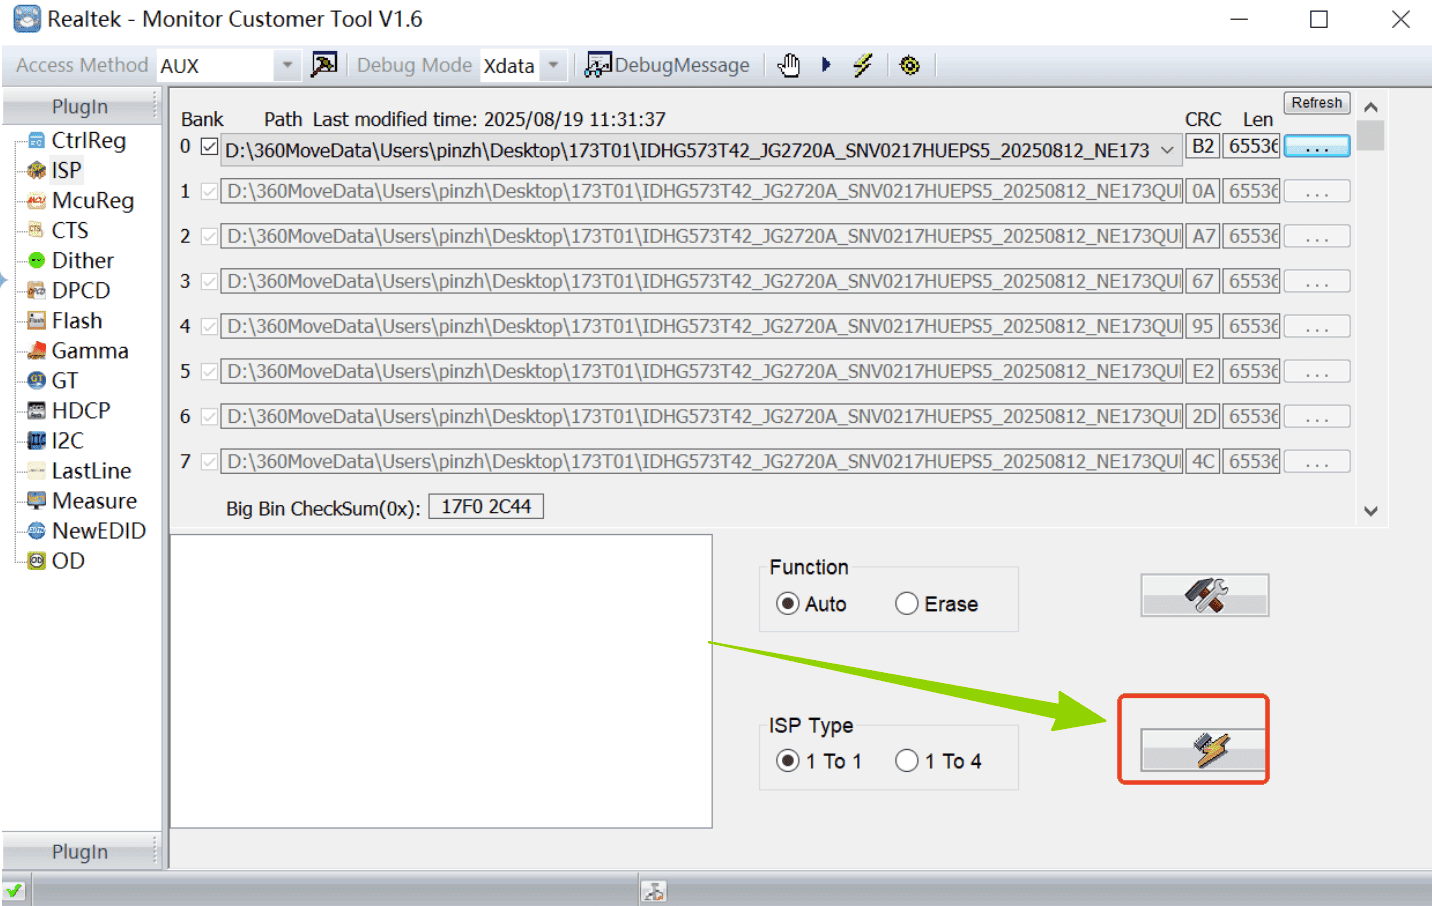
- 7. Click the lightning icon to start the upgrade.
- 8. The upgrade process is as follows:

Switch 2 to Portable Monitor (USB-C & HDMI) Video
If you upgrade the firmware of your portable monitor, you’ll get an additional connection option, meaning your Switch 2 can connect not only via HDMI but also via USB-C. For more complete connection steps, please click to watch this video!
Share:
Best World Cup Gift Ideas for Football Fans in 2026!