

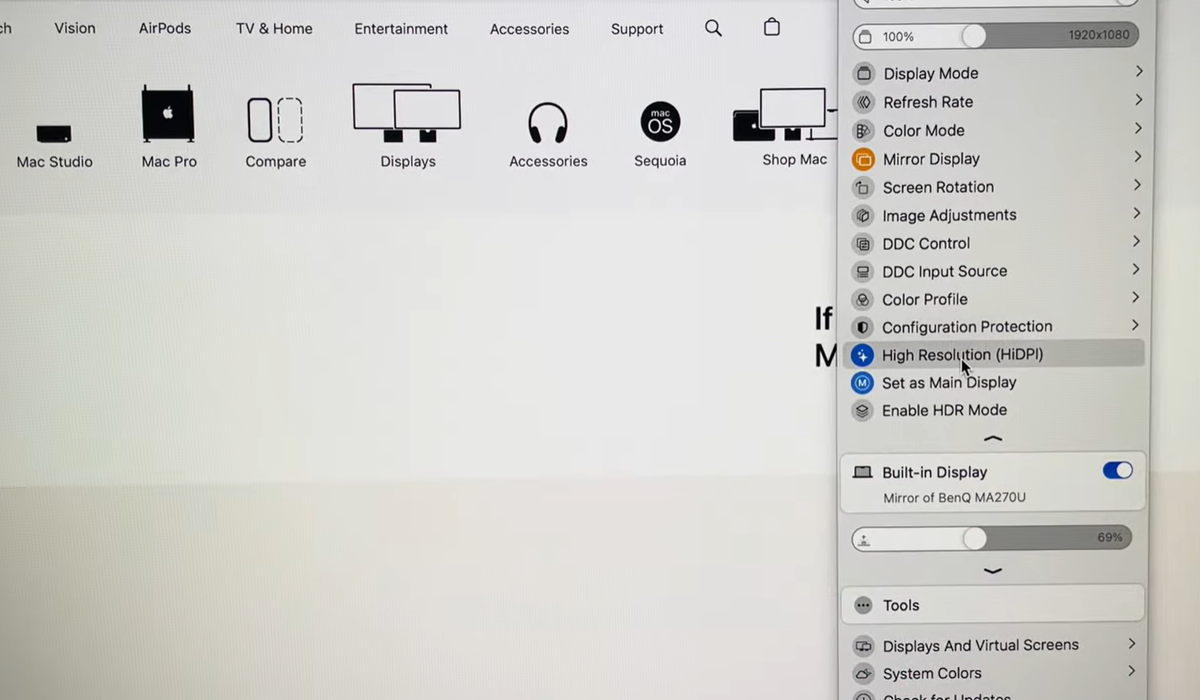
Scaling with macOS can be complex and may lead to sub-optimal visual experiences on external monitors. Thus, understanding the baseline display resolutions can significantly improve your overall user experience.
Why does macOS scaling often lead to confusion? This is a common question that has been asked by many users and here's the reason why: macOS calling can be a bit confusing because it involves complex interactions between display resolutions and how the operating system renders visual content. Many users have claimed that they find that the scaling options do not provide clear visual feedback, thus, leading to frustration.
When it comes to 4K monitors, on the other hand, they have issues that have relation to problems with scaling (DPI). The application, especially on Windows, may also appear to be blurry. These high resolution displays clearly offer stunning visuals and experiences, however they have their fair share of issues.
Why Does 1440p Look Blurry on macOS?
This happens when the external display cannot support the Retina high pixel density mode (HiDPI) of a Mac which is about 220 ppi (pixels per inch). Unfortunately, most 1440p monitors have such low density that macOS to use non-integer scaling an reducing the image quality. The images becomes softer, there’s less texture and crispness, and some visual artifacts show up. This leads to an overall blurry and unpleasant display, especially for content with tiny or fine details.
Scaling: Windows vs macOS
Windows and macOS handle display scaling quite differently, particularly with high-resolution displays. macOS uses a HiDPI scaling method that makes text and UI elements larger and smoother, while Windows allows for independent adjustment of resolution and scaling, which can lead to different visual experiences across applications.
HiDPI Basics: How macOS Handles Pixel-Doubled Rendering
macOS uses pixel-doubling rendering to enhance the appearance of UI elements on high-resolution displays, effectively rendering content at a higher resolution and then scaling it down for display. This method allows them to achieve sharper text and images, but it can also impact performance, as the system processes more pixels than are actually displayed.
Physical vs. logical resolution
HiDPI refers to displays with a high pixel density, where more physical pixels are used to represent a single logical pixel. This results in sharper images and text, as the logical resolution is effectively scaled to utilize the higher physical resolution of the display.
What does 2× HiDPI mean?
2× HiDPI means that the display uses twice as many physical pixels in each dimension compared to the standard resolution, resulting in sharper and more detailed images. For example, a standard high-definition display is 1920x1080. A HiDPI version of the display might be 3840x2160. But not all HiDPI screens are 2x high-definition.
Are 4K Monitors The Best HiDPI Experience on macOS?
If you want macOS to look the way Apple actually designs it to look, a 4K monitor is where things start to click. macOS is built around HiDPI rendering, which means the system prefers to draw the interface at double resolution and then scale it down cleanly. On a 4K display, macOS can run at “1080p (HiDPI),” giving you a 1920 × 1080 workspace rendered using all 3840 × 2160 pixels. The result is sharp text, consistent UI sizing, and a desktop that feels balanced rather than cramped or blurry.
Behind the scenes, macOS always renders the interface at a higher resolution than what you see on screen. With a 4K panel, this internal rendering aligns perfectly with the display’s pixel grid. Each logical pixel maps evenly to physical pixels, which is why fonts look crisp and icons retain their intended detail. Nothing has to be approximated or stretched.
This is where macOS differs from Windows. Windows often relies on fractional scaling, adjusting elements on a per-app basis. macOS takes a clarity-first approach instead, favoring clean integer scaling wherever possible. A 4K monitor fits that design philosophy extremely well, which is why it consistently delivers the most predictable and comfortable visual experience on macOS.

1440p Monitors and Why They Do Not Scale Well
On paper, 1440p monitors seem like a sweet spot. In practice, macOS struggles with them. The main issue is non-integer scaling. A 2560×1440 panel technically supports one perfectly mapped HiDPI mode: logical resolution of 1280×720, which renders at exactly 2560×1440. This is a true 2x integer HiDPI mapping with no downscaling.
However, macOS hides this option by default. It does not appear on the standard scaling slider. You can reveal it by holding Option while clicking the resolution controls.
All of the other scaled HiDPI choices that appear in the regular menu rely on fractional downscaling. That creates soft text, slightly blurry UI elements, and occasional visual artifacts.
Unlike 4K or 5K displays which expose practical clean 2x HiDPI modes by default, the only pixel‑perfect 2x HiDPI option on a 1440p panel renders UI elements extremely large for most users, so it is rarely used.
This is a design choice from Apple. macOS is optimized for displays that offer practical, usable clean pixel doubling out of the box.
Using Third-Party Scaling Tools
There are some tools that already exist because many people already own 1440p monitors and want to make the best of them. These utilities can force HiDPI-like modes and expose hidden resolutions that macOS does not show by default. In some cases, they can improve usability and make text more readable. Some good examples include BetterDisplay, SwitchResX, etc.
However, there are often trade-offs. These tools rely on system-level overrides, which can introduce bugs, compatibility issues after macOS updates, and occasional performance hiccups. Some users report sleep and wake problems, display glitches, or broken scaling after system upgrades. There are also security considerations, since these kinds of apps often require deep system permissions.
Recommended Setup and Buying Advice
If you are currently using a 1440p monitor on macOS, the best approach is to run it at native resolution, avoid aggressive scaling, and accept slightly larger UI elements for the sake of clarity. Third-party tools can help, but they are a workaround, not a true fix.
For a long-term setup, a 4K or 5K monitor is the better investment. These displays align with macOS’s rendering model and deliver consistently sharp text, stable performance, and fewer headaches. If you care about comfort, readability, and visual consistency, higher pixel density matters more than raw screen size.
Conclusion
macOS is built around HiDPI and clean pixel scaling. Fighting that design usually leads to frustration. While 1440p monitors can work, they will always feel slightly compromised. 4K and 5K displays, on the other hand, let macOS do what it does best. The result is a calmer, clearer desktop that simply feels right over long hours of use.
Share:
What Are the New Hardware Features of the ROG Ally and Xbox Ally?
What Are the Different VESA DisplayHDR Certification Levels?
1 comment
When Apple went all in on their Retina displays which basically means pixel density is enough on a certain screen size to make single pixels look imperceptible at the average viewer length for that device. In layman’s terms it means Apple only recognizes HiDPI screens as something 2K or higher. Anything less such as a 1080 or 1440 resolution screen won’t look so great. Apple basically focused on HoDPI screens and stopped trying to make lower DPI screens look better. If you buy a Mac today and want an external monitor. You are advised to buy a 4K or higher resolution model. Ideally a 5K if you are buying a 27" screen.